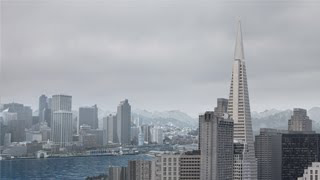
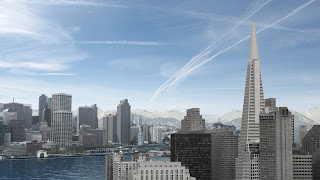
Good job, apply a mask on the fin in the part of the video that is disappearing just before going behind the transamerica.
Thursday, December 3, 2009
Thursday, November 12, 2009
Class 11 Jeff Bedrick
I showed my progress so far:
I need to start no too close to the zeppelin, also why using a mask on the video for the wig, it's easier to have a still image of the boat with the wig and animate that...
Fix the borders on the zeppelin the choker it's eating part of the pixels and start moving the camera from the very beginning until the end, don't stop it.
Thursday, November 5, 2009
Class 10 Jeff Bedrick
This is my work in progress, I've worked only on the zeppelin and the water, the water is a real footage I filmed on the bay.
The feedback Jeff gave me was to put the zeppelin a little more up because at the end it hides behind the Transamerica Building, the camera move it's too sharp, I should make it smoother and play with the layers in after effects to give depth to the pic.
The water is looking good, I don't need to add any kind of animation to the reflects but I still need to make the camera travel from the pic and see little movement on the buildings.
A classmate told me to use something called match choker. Effects>Matte>Match Choker to get rid of the dark border of the object coming from maya.
Cool site to look for pics: http://www.compfight.com/
Thursday, October 22, 2009
Class 8 Jeff Bedrick
I have a final project proposal:
This is kind of what I want to do for my final, I might change the city landscape to do a new one but I want to keep the Transamerica Building.
YUppiiiii!!! he approved my previous landscape, so it's gonna be easy to do!!, I just need to model the zeppelin.. the birds he said they should be smaller and flying horizontally, right now they are distracting, and I should film real water an put it on my scene the same with the estela the boat leaves....
I might also add little movement on the clouds in the back.
I need to cut the hilton building to move it later when I do the zoom out, also ease in and out on the camera move and the starting shot a little more far away so the change before the starting camera and the final one is not that big.
Tips on my scene:
I need to optimized my scene in photoshop, merge layers that are working together, example:
Merge sky as a single layer, merge all mountains into 1 layer, middle ground merge everything but the water and atmosphere in that level and so on...
Thursday, October 15, 2009
Class 7 Jeff Bedrick

This is my final, Jeff gave me some corrections to make but I worked on them during the class.
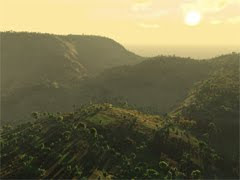
Jeff talked to us about Vue 7 which is amazing to create landscapes, here is an example:

We gotta start thinking about our final project, it should include animation (I'm happy with that because that's my area of expertise haha) but I don't think I have to much time to work int his project...
He gave us a link to a cool tutorial on 3D compositing:

Thursday, October 8, 2009
Class 6 Jeff Bedrick
Thursday, October 1, 2009
Class 5 Jeff Bedrick

This is my proposal for my midterm. Jeff said it is a good start, I have a nice color palette. I need to fix the light direction, the middle ground city gives me that direction, put more contrast in the foreground.. I should think on flipping the foreground city to get a better light direction.
Jeff recommended visit this site: http://www.conceptart.org/
Thursday, September 24, 2009
Class 4 Jeff Bedrick

This my last attempt on this assignment, this time the feedback was more motivating than last class, he said is looking much better than last week. I still need too reduce the contrast and saturation on the trunk and I should avoid mirror looking things like the trees in the middle in the background.
Jeff gave us a neat trick, suppose you have a layer with transparency on it and then you create another layer full layer with some kind of texture or color on it, by just pressing alt + middle line between the 2 layers is gonna take the transparency that is on the tree layer and apply it to the texture layer. Texture layer should be on top of tree layer.
We had also to show some picture for our final, he liked the ones that were taken in San Francisco, he recommended me to stay local so I can always go back and take some more pictures if I need them, I need to bring more pics for the background and foreground.

Thursday, September 17, 2009
Class 3 Jeff Bedrick

Here is my second try of this assignment, I think this one looks better...
If we need to correct a picture we can use in PS filter>distort>lense correction... this can help correct perspective, fish eye, etc...
It's important to notice that in the horizon line the sky gets lighter.
To make a reflexion on water we need to duplicate and flip vertically the image that is gonna be reflected, use multiply on it, mask the part we want to hide and blur the "reflexion".
These are the crits on my last assignment:
If I'm gonna do a sunset I need to put light on the ground and long shadows from the bushes and trees, so he recommends me to change the sky to have less work to do. There is also inconsistency on the blur, some parts have blur others don't, I should try to be consistent.
In the layer mode, Darker color pinta basicamente sobre aquello que es bright.
By compressing the levels in a mask puedo ponerle un poco mas de blur en los bordes de la cosas.
Thursday, September 10, 2009
Class 2 Jeff Bedrick

Today we started the class giving some crits to assignments from previous classes, he told us to try to keep our color palette not too saturated... mine was totally saturated....
Applying effects:
Duplicate of the layer and then convert it to smart object, hide original and apply filter example blur (smart filter), and that one can be edited, wherever you paint black on the mask is going to hide the effect.
To affect inmmediate layer:
Press alt and click middle line between layers ---> esto hace que el efecto se aplique al layer de abajo.
This is what I got about my assignment:
It has a nice depth of field but some of the edges of the trees on the right are still too sharp. Jeff recommends me to have a brighter sun and less yellow, the trunk needs to be integrated to the grass, by using stamp tool with a grass brush taking samples from the grass it can be done easily.
Walk-through process:
1- Set the correct size
2- Clean the scene with masks
Select channel layers , blue channel shows us a better separation between sky and the rest. Duplicate the blue channel and on the new one go to levels and start compressing the levels, then paint what's needed to have clear black and white picture. Then with ctrl+dotted circle make a selection and invert it, then use it as a mask.
Exercise:
-Atmosphere perspective
-Clean plate from multiple shots
Demos:
-Photo Align
-Photomerge
Assignment:
Correct the image done
New link: www.mayang.com/textures
Class 1 Jeff Bedrick
Jeff told us that the best resolution to work with was 1280x720 but for drafts 720x360.
We should follow the rule of thirds. He recommended the following links:
www.videocopilot.net --> tutorial digital art
www.creativecow.net
www.photoshopsupport.com
www.cgtextures.com
He showed us some tutorials about masking and curves that were great for me (animator who is trying to learn matte painting).
The assignment for next week is to compose one cloud, a landscape and a foreground element.
Remember to name the assignment this way:
lastname_anm631_proj1_draft01.jpg
lastname_anm631_proj1_draft01.psd
Subscribe to:
Posts (Atom)
